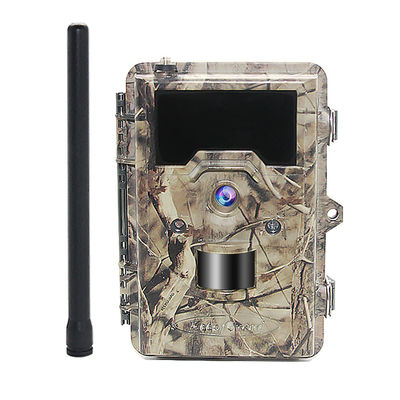
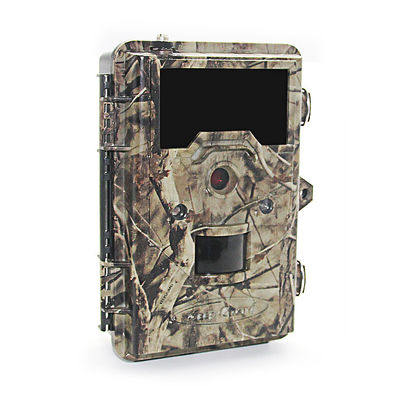
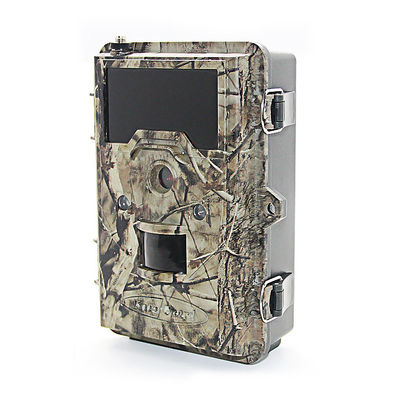
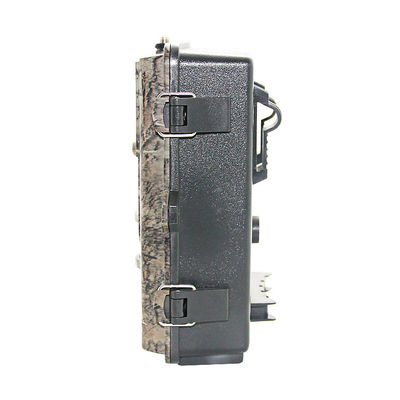
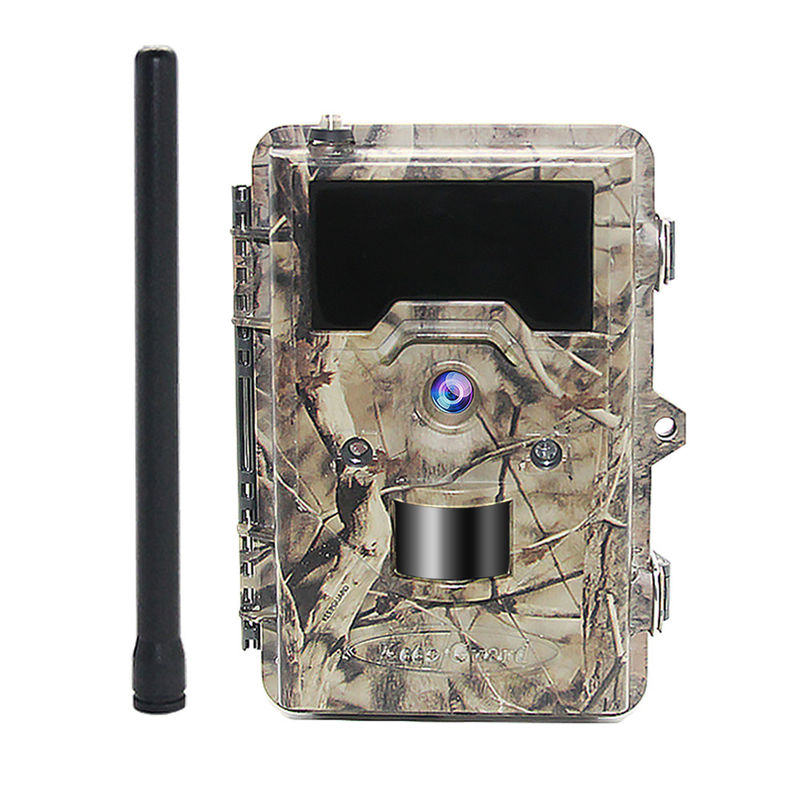
Custom IR Monoculars Night Vision Rifle Scopes 10-30x60mm Escape Zoom
Product Details:
| Place of Origin: | China Shenzhen |
| Brand Name: | KeepGuard |
| Certification: | FCC/WEEE/CE/RoHs |
| Model Number: | KG870 |
Payment & Shipping Terms:
| Minimum Order Quantity: | 100pcs |
|---|---|
| Price: | Negotiable |
| Payment Terms: | Western Union, L/C, T/T |
| Supply Ability: | 10000pcs per month |
|
Detail Information |
|||
| Material: | Pvc | Color: | CAMO |
|---|---|---|---|
| Range: | 20-25m | Weight: | 0.65 |
| Highlight: | Digital Night Vision Monocular,Infrared Binoculars |
||
Product Description
Parameter Settings Display
The settings for each parameter are shown on the display screen of your WIRELESS Trophy Cam HD. All the available settings for the currently displayed parameter are shown on one screen, with a checkmark next to the current setting. To change the setting, first use the UP/DOWN keys to highlight (select) the new setting you want, then press OK to “Execute” the actual change to the selected setting. The checkmark will appear next to your new setting to confirm this.
EXAMPLES-Changing the Settings of Some Common
Parameters
Following this page, you will find tables listing all of the parameters found in the SETUP Menu, along with their possible settings (or range of settings), and a detailed description of what the parameter controls and what the settings do. If you read the previous section detailing how to select parameters and change their settings, you should be able to dive right in, find the parameter you want, and setup the camera to suit your preferences. But maybe you’d rather walk through an example or two first:
To change any parameter’s setting, always start with the power switch in the SETUP position. After the LCD comes on, wait until you see the message "Wireless Network Initialization Success!", then press the MENU key. The first parameter you will see when you first enter the SETUP Menu is “Mode”. To change it from its default setting of “Camera” (still photos) to “Video” (shoot video clips), press the DOWN key to select the “Video” setting. Press the OK key to “Execute” (Set) the new setting you’ve selected for this parameter.
Now press the RIGHT key to move to another parameter in the Menu. Pressing it three times will take you to “Capture Number”. Try using the UP and DOWN keys to scroll through the range of settings, then press OK to lock in your setting for the number of photos the camera takes each time it's triggered. Press the RIGHT key until you reach the "Default" parameter. Highlight to select “Execute” (using UP or DOWN) then press OK to restore all parameters (including the Mode and Video Length parameters you changed a minute ago) back to their original factory default settings. The default settings foreach parameter are indicated in bold type in the SETUP Menu tables on the next several pages. Be sure the current date and time are set correctly if you choose to set the “Time Stamp” parameter to “On”, since that will tell the camera to imprint the date and time on each of the images it captures. The camera will get the date and time when it first connects to the network. You can also manually set or adjust the date and time, using the "Set Clock" parameter in the SETUP Menu.
Field Scan 2x with Live Trigger Feature
Field Scan is a revolutionary new feature for the WIRELESS Trophy Cam HD, which allows you to monitor your food plots or field edges with time lapse images or video. When set to “On”, the WIRELESS Trophy Cam HD will take a photo (or record a video clip) automatically at your choice of intervals (for example, once every five minutes) during one or two blocks of time you set up for each day, without requiring a trigger from an active animal. This has the advantage of giving you the ability to monitor the edge of a field that might be 50 or 150 yards away from the camera out of the PIR sensor’s range.
The result is an effective range much greater than it would normally be, with the camera dependant on triggers generated by nearby animals. This is a great tool to scout an entire field with only one camera. If an animal does enter the area covered by the PIR sensor and generate a trigger event during a time in between the Field Scan intervals you set, the camera will capture an image or video just as it normally would, based on your other menu settings. Here’s how to setup and use Field Scan (be sure you’ve set the current time in “Set Clock” first, so your Field Scan recording will stop and start at the correct times of day):
1. Move the main switch to SETUP, then press MENU.
2. Keep pressing the RIGHT key, stepping through the Setup Menu until you reach Set Field Scan.
3. Press the UP key to select On, and press OK. You will see "A", representing the first block of time you can define (a second block of time later in the day, "B" can also be setup if you wish). Press OK. This takes you to the screen to set Start and Stop times, which determines the clock times when the first block of Field Scan recording will begin and end for each day. You can set these times to the exact hour and minute you want, for a recording “window” that lasts anywhere from just a minute to a full 24 hours.
4. Set the [Start] and [Stop] times, beginning with the Start hour, using the UP/DOWN keys to change the setting. The hour setting is based on a 24-hour clock, with “00” hours = midnight, “12” hours = noon, “23” hrs = 11PM, etc. To move to the next setting, press the RIGHT key, change the minute for the Start time with UP/DOWN, then on to the hour and minute settings for the Stop time.
5. After you finish setting the Stop minutes, press OK to confirm your settings for the first block of Field Scan recording. If desired, you can create a second block of time by pressing the DOWN key to select "B", then press OK and follow the same process to set Start and Stop times for Field Scan block "B". As an example of how you might use these two available time blocks, you could setup Field Scan time block "A" for the dawn hours from 6 AM to 8 AM, and block "B" to capture images between 5:30 and 7 PM. No Field Scan recording would occur from 8AM to 5:30PM, or from 7PM to 6AM.
6. After setting Start/Stop times to define Field Scan block "A" and/or "B", press OK, then press the UP or DOWN key to select "Interval" and press OK. The Field Scan "Interval" setting lets you control how often a photo or video clip is recorded during the block(s) of time you defined with the Start and Stop settings. Your options are 60 minutes, 30 minutes, 15 minutes, 5 minutes (this is the default), or 1 minute (still photo mode only). Use the UP/DOWN keys to select your preference, then press OK
to save it. Note that for videos, "Interval" is independent of the Length of each video recording-it’s how often videos are recorded, not how long each one lasts.
7. Here’s an example of how the camera would operate, based on the following Field Scan settings:
Field Scan: On
Field Scan A:
[Start]: 6:00
[Stop]: 8:00
Field Scan B:
[Start]: 17:30
[Stop]: 19:00
Interval: 15M
Note: avoid any "overlap" of Field Scan A & B recording blocks when setting their start and stop times, to assure correct operation. Also-if the "Camera Mode" menu parameter is set to "Day" or "Night" operation only, that will take priority over your Field Scan settings. Set the Camera Model to "24 HR" if you are setting both day and night start and/or stop times in Field Scan.
These settings would cause the camera to capture a photo (or video, if the camera is set to that mode) once every 15 minutes, beginning at 6AM, until the Field Scan "A" recording block stops at 8:00 AM. Later that day, the camera would again take a photo or video every 15 minutes between 5:30 PM and 7:00 PM (during Field Scan time block "B"). The next day, the camera would again record an image or video once every 15 minutes between 6:00 and 8:00 AM, and between 5:30 and 7:00 PM.
No Field Scan recording would occur from 8AM to 5:30PM, or from 7PM to 6AM. Remember, Field Scan recording is independent of normal triggers due to animal activity–even if no animals enter the IR sensor coverage zone, an image or video will still be captured every 15 minutes during the block(s) of time. If an animal triggers the camera “in between” the 15 minute intervals, it will be recorded.
THE WIRELESS SUBMENU: Structure
| Level 1 | Level 2 | Level 3 | Level 4 | Level 5 |
|
Wireless Setting > (ON/OFF) |
MMS > |
Auto Setting >
|
Select: Country >
|
Select: Provider |
|
Manual Settings > |
Enter: URL, APN, IP, Port |
|||
|
Phone Numbers > |
Enter: Phone #(s) |
|||
|
Address > |
Enter: Email(s) |
|||
|
Email via SMTP > |
Auto Setting > |
Select: Country > |
Select: Provider |
|
|
Manual Settings > |
Enter: APN, Server 1, Port, Sender, Password |
|||
| SMTP Type > |
Select: with SSL, without SSL |
|||
|
Address > |
Enter: Email(s) 2 |
|||
|
Daily Max Number > |
Enter: Daily Number Max (1-999) (199=default) |
1 Gmail is a recommended choice of sender. To setup, use "smtp.gmail.com", Port 465, with SSL.
2 Receiving email address for the thumbnail images.
THE WIRELESS SUBMENU: Reference Guide
MMS (Multimedia Messaging Service) > Auto or Manual Setting
MMS uses text messaging data to include photos or other media files within certain size limits. Select "Auto Setting", then simply select the name of the country and service provider. Select "Manual Setting" if "Auto" doesn't work correctly, or if you wish to enter the URL, APN (host address), IP and Port for your mobile carrier service yourself*.
MMS > Phone Numbers/Email Address
Select "MMS" and enter the mobile phone number(s) and/or email addresses you want the camera's thumbnail images sent to.
Email via SMTP (Simple Mail Transfer Protocol)
An Internet email protocol, SMTP handles thumbnail images sent from client (transmitting device) to an email server. Both MMS and SMTP allow control of the camera remotely via text messages. Use SMTP to receive images as data rather than text. Limited auto setup if your SIM has data service active is available (for SMTP carrier info). You will still need to add your personal email, address and password as sender in the "Manual Settings" screen. Next, select the sender's "SMTP Type" (with or without SSL), and input the receiver's email address ("Email Address" screen). We recommend setting up a separate Gmail account for the camera to use as "Sender".
Preferences > Daily Max Number
Select "Daily Number" then enter the maximum number of messages you receive per day, from 1 up to 999. The table on the next two pages lists the various text messages which you can send to your camera, a short description of the result when it's received (action or change to the setting of a Setup menu parameter), and the confirmation response/display from the camera.
Note: if a command is not entered correctly, the camera will respond with "Invalid command ! "
WAKE / ECO MODE OPERATION
Your 2G Wireless Trophy Cam HD operates by default in "ECO" mode, to ensure the longest possible battery life. However, the use of "WAKE" mode is required if you want the camera to "listen" for your remote (SMS text) commands constantly-for example, #PIC# and other commands that require an immediate action. In ECO mode, the camera can only check for and respond to new commands when it connects to the network (per Send Interval when triggered, and once per day during daily check in, around 3PM local time).
Both WAKE and ECO can be selected/changed via SMS text commands from your smartphone. If the camera is in ECO mode and you send the WAKE message, the camera will respond at the next network connection opportunity (trigger or daily checkin) and switch to WAKE mode. If the camera is in WAKE mode and you send the ECO message, the camera will respond to the command at once and switch to ECO mode.
When the camera's power is first switched on (manually), it is in the default ECO mode. If WAKE mode was previously selected remotely, and the camera power is manually switched off then back on, WAKE mode operation will resume after the first trigger.
Note: When the camera is in ECO mode, the PIC command will not work.
Still Photo and/or Video Quality Problems
1. Night photos or videos appear too dark
• Check the battery indicator icon to see if battery power is full. The flash will stop operating near the end of the battery life.
• You will get the best results when the subject is within the ideal flash range, no farther than 60' (19m) . Subjects may appear too dark at greater distances.
• Please note that when the Capture Number parameter is set higher than "1 Photo", or with very short Interval settings, some images may appear darker than others due to the quick response and rapid retriggering of the camera, allowing less time for the flash to fully recharge before firing again.
• Make sure "LED Control" in the setup menu is set to "High" to ensure maximum output. You can also try setting "NV Shutter" in the menu to "Low" (slower shutter speed=brighter images, with tradeoff of increased blur if subject moves rapidly).
• The ARD (anti-reflective device) shield can be removed to maximize flash output. See page 34 for more details.
2. Daytime photos or videos appear too dark
• Make sure that the camera is not aimed at the sun or other light sources during the day, as this may cause the auto exposure to produce darker results.
3. Night photos or videos appear too bright
• If the subject is close to the camera (less than10ft/3m), change the LED Control parameter in the Setup Menu to "Medium" or "Low".
4. Daytime photos or videos appear too bright
• Make sure that the camera is not aimed at the sun or other light sources during the day.
5. Photos with streaked subject
• In some cases with low lighting conditions and fast moving subjects, the 5MP or 8MP resolution settings may not perform as well as the 3MP setting.
• If you have multiple images where fast moving subjects produce streaks on the photo, try the 3MP setting instead.
• Set "NV Shutter" to "High" to minimize motion blur.
6. Red, green or blue color cast
• Under certain lighting conditions, the sensor can become confused resulting in poor color images.
• If this is seen on a consistent basis, then the sensor may need servicing. Please contact customer service.
7. Short video clips—not recording to the length set
• Check to make sure that the SD card is not full.
• Make sure that the camera has good batteries in it. Near the end of the battery life, the camera may choose to record shorter video clips (or even stop recording video, only still photos) to conserve power.
Date/Time Stamp not appearing on images
Make sure that the “Time Stamp” parameter is set to “On”.
Photos Do Not Capture Subject of Interest
1. Check the “Sensor Level” (PIR sensitivity) parameter setting. For warm temperature conditions, set the Sensor Level to “High” and for cold weather use, set the sensor for “Low”. For variable weather, use "Auto".
2. Try to set your camera up in an area where there is not a heat source in the camera’s line of sight.
3. In some cases, setting the camera near water will make the camera take images with no subject in them. Try aiming the camera over ground.
4. Try to avoid setting the camera up on small trees that are prone to being moved by strong winds.
5. Remove any limbs that are right in front of the camera lens.
PIR Sensor LED Flashes/Doesn’t Flash
1. When the camera is in the “Setup” mode, a special LED on the front of the camera will flash when it senses motion. This is for setup purposes only and will help the user aim the camera.
2. During use, the LED will not flash when the camera takes an image. This is to help keep the camera hidden from game.
LCD Screen Issues
1. LCD screen powers on but no text is present.
• After moving the switch from “Off” to “Setup” or “On”, make sure that the switch is correctly in position to ensure the proper mode (avoid positions “between” two modes).
• Do not move the switch directly from “On” to “Setup”-always move the switch all the way down to “Off” first, then back up to “Setup”.
2. Screen comes on but then powers off
• Make sure that you have installed the SD card correctly.
Camera won’t retain settings
Make sure that you have been saving the changes to any parameter settings that you made while in Setup mode, by pressing “OK” after changing the setting. If you don’t save your new setting after changing it, the camera will continue to use the original default setting for that parameter.
Moisture or Ants Inside Camera
1. To ensure humidity or rain is kept out of the camera, secure the DC In plug firmly in place.
2. Ants can be attracted by low level electronic vibrations, and enter through any gaps between the exterior and interior of the camera. Make sure the DC In plug is securely attached.
Field Scan (Time Lapse) not working properly
1. Make sure that the stop and start times of Field Scan "A" and "B" do not overlap (for example, do not set the start time of "B" to 8AM if the stop time of "A" is 10AM).
2. When using Field Scan in video mode, the smallest interval time available is 5 min, to avoid potential overheating of the batteries and electronic components, which could cause operational failure or damage to the camera. In still photo mode, a 1 min. Interval can be set.
Do not mix old and new batteries.
Do not mix battery types-use ALL lithium or ALL alkaline.
Rechargeable batteries are not recommended.OUBLESHOOTING / FAQ : WIRELESS FU
Q: Why won't the GPS command work?
A: Your SIM must have data service active to use this function. Some carriers may not support this feature.
Q: Why can't I send commands to control the camera remotely?
A: You must have text service activated by your carrier.
Q: Why can't I get SMTP to work?
A: Make sure your SIM has data service active. Make sure you input both sender and receiver email setups correctly. It is also recommended to set up a separate email account (Gmail) for the camera.
TECHNICAL SPECIFICATIONS
| Image Sensor | 5 Megapixel HD Color CMOS |
| Lens | f=7.36mm F/NO:3.2 FOV=55°; Auto IR-Cut-Remove (at night) |
| IR-Flash Range | 20m-25m; 33 LEDS |
| Display Screen | 2.4 inch Color Display |
| Memory Card | SD or SDHC Card, Maximum capacity 32GB |
| Image Size |
12MP(4000×3000);8MP(3264×2448);5M(2592X1944); 3M (2048X1536); |
| Video Size | 1920*1080P |
| PIR Sensitivity | PIR with 3sensitivity levels:High/ Normal/ Low |
| Operation | Day/Night |
| Response Time | < 0.6 s |
| Triggering Interval | 1sec-60min programmable |
| Shutter Speed | 1/10-1/2000sec. |
| Shooting Numbers | 1-3 programmable |
| Video Length | 5-60sec. programmable |
| Power Supply | 12×AA recommended;6×AA as emergency power |
| Stand-by Current | <0.28mA |
| Power Consumption | <200mA(+600mA when IR-LED Lighted) |
| Timed Scan | programmable |
| Temperature Display | programmable |
| Password | programmable |
| Camera Name | Input |
| Moon Display | programmable |
| Audio Video | programmable |
| MMS Mode | Instant/ Fixed time |
| MMS Function | On/ Off |
| Send to Mobile Phone | 1-5 phone number programmable |
| Send to Email | 1-5 Email address programmable |
| User Interface | LCD display |
| Interface | USB;SD card holder; 9V DC external |
| Security | Strap |
| Operating Temperature | -20-60℃(Storage temperature:-30-70℃) |
| Operating Humidity | 5%-90% |
![]()
![]()
![]()
![]()
![]()


