


 |
Night Scope Binoculars Night Vision Rifle Scopes Built In Tripod Mount
Product Details:
| Place of Origin: | China Shenzhen |
| Brand Name: | KeepGuard |
| Certification: | FCC/CE/RoHs/WEEE |
| Model Number: | KG870 |
Payment & Shipping Terms:
| Minimum Order Quantity: | 100pcs |
|---|---|
| Price: | Negotiable |
| Payment Terms: | Western Union, L/C, T/T |
| Supply Ability: | 10000pcs per month |
|
Detail Information |
|||
| Material: | Pvc | Color: | CAMO |
|---|---|---|---|
| Range: | 20-25M | Weight: | 0.65 |
| Highlight: | Infrared Binoculars,Night Scope Binoculars,Tripod Mount Night Vision Rifle Scopes |
||
Product Description
INTRODUCTION
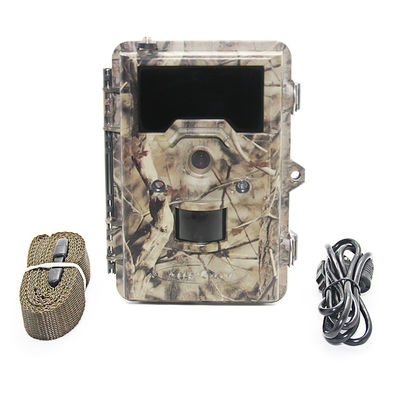
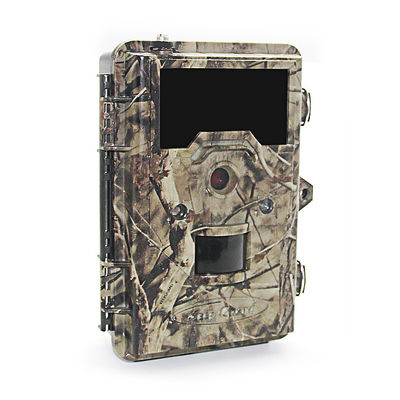
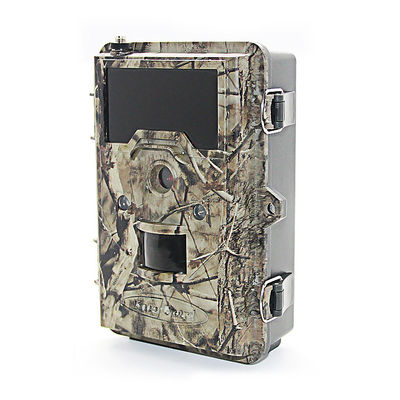
The KEEPGUARD WIRELESS CAM is the latest generation of the KEEPGUARD CAM. It contains a GSM cellular module which can transmit pictures directly from camera to your cellular phone or email box. It supports MMS/SMTP/E-mail via GSM network. It supports four network bands: 850MHz, 900MHz, 1800MHz, and 1900MHz. Video can not be sent via cellular network.![]()
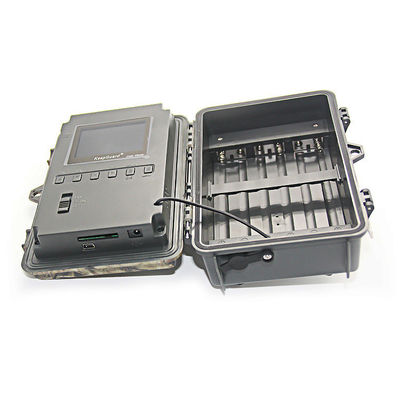
Loading Batteries
After opening the two latches on the right side of the camera, you will see that it has 12 battery slots. For maximum battery life, we recommend using 12 lithium AA or alkaline AA batteries.
Using an External Power Source
Optionally, you can connect an external 9V DC power source to the "DC In" jack at the bottom of camera. It is recommended to use a power source with a current output greater than 1000mA. Please make sure that the polarity is correct.
Inserting SD Card
This camera have 32MB internal memory, which is for camera upgrade. Insert the SD card ( OFF mode ) before beginning to operate the camera. SD card is supported up to maximum 32GB capacity.
Formatting the SD card:
Formatting the SD card removes all files on the memory card and prepares for camera. Press the MENU, then RIGHT or LEFT key several more times to move to the “Format” parameter setting menu. Press OK key to enter sub-menu, Press the UP or DOWN key to highlight YES and press OK.
Installing SIM card
Camera will send pictures to GSM provider, the SIM card in the camera must be from a GSM provider. Make sure your camera mode selector switch is in the OFF position. Insert the SIM card into the card slot with its metal contacts upwards (see right) until it bottoms out and then release. It will snap in place. To remove the SIM card, press on the card until it clicks and then release it.
THE OFF, ON, and SETUP MODES
The KEEPGUARD WIRELESS CAM has three basic operational modes:
OFF Mode
The OFF mode is the "safe" mode when any actions must be taken, e.g. replacing the SD card or batteries, or transporting the device. You will use OFF mode if you connect the camera to a computer′s USB port to download your photos/videos.
ON Mode
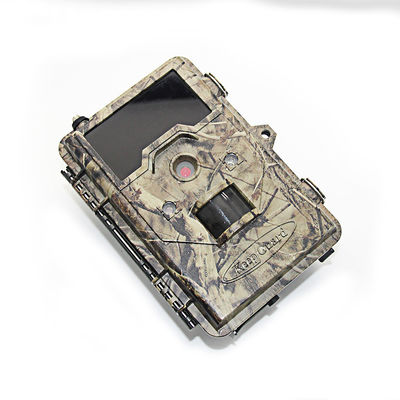
Once in ON mode no manual controls are needed or possible (the control keys have no effect). The KEEPGUARD WIRELESS CAM will take photos or videos automatically (according to its current parameter settings) when it is triggered by the PIR sensor′s detection of activity in the area it covers.
SETUP Mode
In the SETUP mode you can check and change the settings of the KEEPGUARD WIRELESS CAM with the help of built-in LCD. Moving the power switch to the SETUP position will turn on the LCD display and you will see an information screen.
Fig. 1: SETUP Information Screen
SETUP Mode Shortcut Keys
1.First switch to the SETUP Mode.
2.Press MENU button.
3.Press RIGHT or LEFT key scrolls to the next or previous parameter.
4.Press UP or DOWN key to select setting for the currently parameter.
5.Press OK to save the new setting.
6.Then switch to ON Mode to take photos or videos.
Wireless Setting Parameters Guide
The camera provides two solutions, i.e. MMS or SMTP, to send the pictures to cell phone and email box.
MMS
If MMS is selected, pictures will be sent to the preset phone (maximum 5 numbers allowed) or email (maximum 5 addresses allowed) or both phone number and email address.
1.Auto setting
a)Country:Choose your Country or Origin in the drop down menu
b)Provider Select:Choose your provider in the drop down menu
2.Manual Setting
If the Country or Provider’s information is not included in the “Auto Setting”, you must select “Manual Setting” and set the parameters for the URL, APN, IP and Port according to the settings the service provider makes available, please contact network service provider if you are not familiar with these settings.
3.Phone No
Enter up to 5 different phone numbers in the Phone NO field. You will need to start every phone number with no spaces or dashes.
4.Email Address
Enter up to 5 different e-mail addresses in the Email field.
SMTP
If SMTP is selected, pictures will be sent from one preset sending email address to one or multiple email addresses via GPRS/HSPA network using the SIM card data plan.
1.Auto setting
a)Country:Choose your Country or Origin in the drop down menu.
b)Provider Select:Choose your provider in the drop down menu.
2.Web Mail: Choose a Web Mail you used as a sending email, it will auto-fill the APN,Server,and Port in the Manual Setting.
3.Manual Setting: If the Country, Provider or/and WebMail’s information are not included in the “Auto Setting”, you must select Manual Setting and set the parameters.
4.Email Address: Choose this option if you only want the photos sent to chosen e-mail addresses.Enter up to 5 different e-mail addresses in the Email field.
WIRELESS TESTING
After you finish the MMS or SMTP Setting, you can make a “Wireless Testing” for KG870NV.
1.Send a test photo
1)Put the power switch in SETUP position to enter the preview screen, set the camera in Camera Mode.
2)Press the LEFT key to take a picture after the camera has searched the mobile signal.
3)The LCD screen will show a step bar. Once it displays “Wireless test over, Send Success”, you have successfully sent your first photo and your camera is ready to take Photos.
2.Send a command code
1)Put the power switch in SETUP/ON position to enter the preview screen.
2)Use the Command Phone send a code #140#, the camera will take a picture after the camera has searched the mobile signal.
3)The LCD screen will show a step bar. Once it displays “Wireless test over, Send Success”, you have successfully sent your first photo and your camera is ready to take Photos.
The SETUP Menu-Parameters and Settings List Descriptions
| Parameter |
Settings (Bold=default) |
Description |
| Mode | Camera or Video | Photos or video clips |
|
Capture Number |
1,2,3 | Selects how many photos are taken in sequence per trigger in Camera mode. |
| IR LED Control | High, Medium, Low | Controls how many LEDs fire when images are taken. ”High” =32 LEDs. Set to medium or Low if photos overexposed or camera in a close range. |
| Interval | 10S | It means how long the PIR sensor will be inactive after each triggering in ON mode. During this user set "ignore triggers" interval, the camera will not capture photos/ videos. This prevents the card from filling up with too many redundant images. |
| Sensor Level |
Normal, High, Low, Auto |
Select the sensitivity of the PIR sensor. The Higher level will make the camera more sensitive and be more easily triggered. The High setting can be useful when he ambient temperature is warm, and the Low setting may help in cold weather. |
| Time Stamp | OFF, On | Select ″On″ if you want the date & time (that the photo was captured) imprinted on every photo, select ″Off″ for no imprint. |
| Set Clock | Set | set the hour 24-hr format only, ″00″ = midnight, ″12″ = noon and minute, and then year, month and date. |
| Set Timed Scan | On, OFF | Select "on" if you want the camera to shot at a specified internal. You can set "start" time, "stop" time and "internal". Select "off" if you don't want to use the timed scan. |
| Image Recycle | ON,OFF | Select “ON” if you want the oldest photos/videos to be replaced by new images once the SD card is full. Select “OFF” if you want operation to stop when the card is full. |
![]()
![]()
![]()
![]()